Deno Tests & GitHub Actions CI
May 23, 2020
#javascript#typescript#node#deno#github-actions#cicd#devops
During a recent project to convert my JavaScript & Node Battlesnake over to TypeScript & Deno, I decided I would also create a more robust suite of tests for it.
If you are unfamiliar with Battlesnake, it is an online and in-person programming competition where you build a AI in the form of a REST API that can play a multiplayer version of the classic game Snake. You can check out details on their website to learn more, and even watch some past events on their Twitch channel.
Tl;dr
- Deno Tests: Deno includes a very simple test runner framework.
- Github Actions: Github actions allow you to automate tasks based on triggers within your Github repo.
- Create the workflow: A .yml file describes a series of actions you would like to perform based on a trigger.
- Automate Deno tests: Just add a
run: deno testcommand to your workflow .yml.
Deno Tests
Deno includes a simple test runner for tests in js, ts, jsx, or tsx files. It can be run with:
deno testTo create tests, all you need to use is use the Deno.test() method included with Deno within files ending in test ({*_,}test.{js,ts,jsx,tsx}) anywhere in your project structure. I put mine in tests/.
Example of a basic test:
import { assert } from "https://deno.land/std/testing/asserts.ts";
import { root } from "../app/main.ts";

Deno.test("Root response contains expected fields", () => {
  // when
  const result = root();
  // then
  assert(result?.apiversion);
  assert(result?.author);
  assert(result?.head);
  assert(result?.tail);
  assert(result?.color);
});
This test is simply asserting that values exist for these specified fields.
You can add many tests to single files by calling Deno.test() over and over again. You can also make as many test files as you like, Deno will automatically execute all the files it recognizes ending in test ({*_,}test.{js,ts,jsx,tsx}).
Visit the Deno Testing docs for more info about creating tests.
Easy! So now I can create a robust set of unit tests for my Battlesnake AI.
Since the game Battlesnake works by sending you the entire game state for every move, I can also save the game state JSON from particularly tricky moves and use them within their own tests. The output can be compared against the single best move, or even a set of equally good moves if their are multiple. Creating tests like this tests the behaviour of the AI overall and ensures that changes to the behaviour aren't making the AI perform worse on moves it previously was able to do correctly.
So now that I have tests up and working, I wanted to automate them using Github Actions.
Github Actions
Github Actions are still quite new to me and I hadn't touched them at all before this project. I just assumed it would be complicated to set up.
For what I wanted to do for this project it was actually trivial. Couldn't have been easier.
What I wanted was to run these tests automatically whenever pushing to my repository. I figured this Deno app is pretty simple all things considered, so I shouldn't have to mess around with Docker or anything like that.
I'll step you through what I did.
Create the workflow
Github Actions are based around these things called workflows. They are essentially .yml scripts that describe the series of events you want to perform in your action.
If you click the Actions tab within the repo you want to create the Action you will be presented with a Get started with GitHub Actions page. This page has many example actions you get you started for so many different languages, frameworks, and platforms. It will even suggest actions to you based on the contents of your repo. I chose the Skip this asn set up a workflow yourself option.
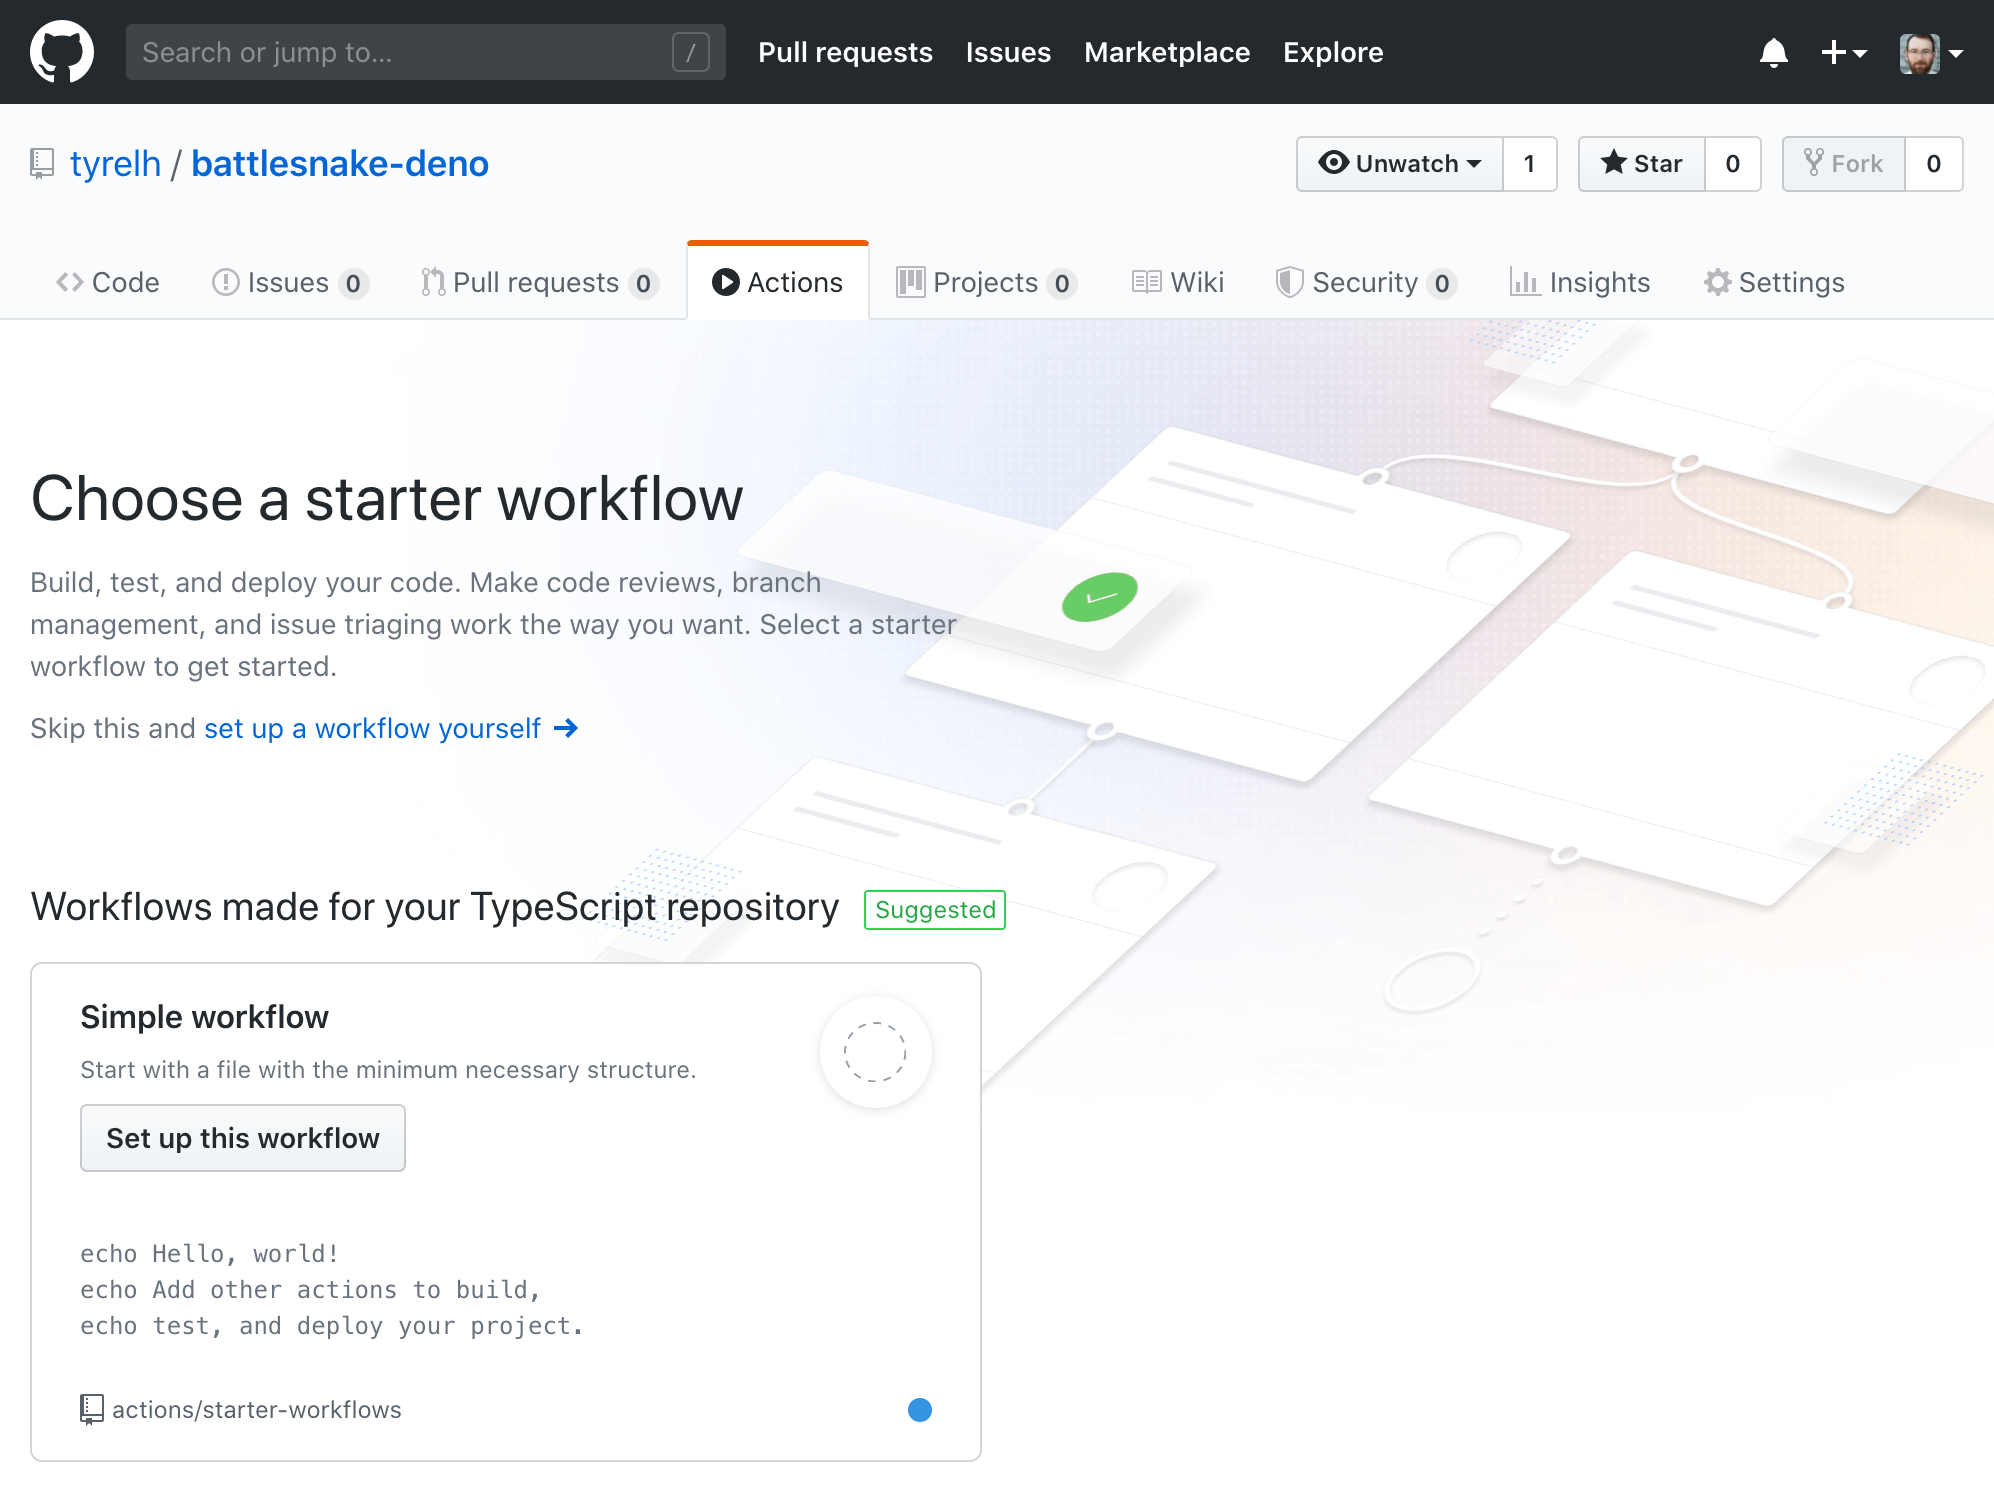
This plops you into a web editor and gives you a basic example workflow .yml file to start with. It looks something like this:
# This is a basic workflow to help you get started with Actions

name: CI

# Controls when the action will run. Triggers the workflow on push or pull request
# events but only for the master branch
on:
  push:
    branches: [ master ]
  pull_request:
    branches: [ master ]

# A workflow run is made up of one or more jobs that can run sequentially or in parallel
jobs:
  # This workflow contains a single job called "build"
  build:
    # The type of runner that the job will run on
    runs-on: ubuntu-latest

    # Steps represent a sequence of tasks that will be executed as part of the job
    steps:
    # Checks-out your repository under $GITHUB_WORKSPACE, so your job can access it
    - uses: actions/checkout@v2

    # Runs a single command using the runners shell
    - name: Run a one-line script
      run: echo Hello, world!

    # Runs a set of commands using the runners shell
    - name: Run a multi-line script
      run: |
        echo Add other actions to build,
        echo test, and deploy your project.
With this you can actually click the Start commit button and that will guide you to commit this .yml file to your repo within the .github/workflows/ directory.
You can see near the top of that file that there are triggers for on push and on pull_request attached to the master branch. You can try to push something to master and see it work!
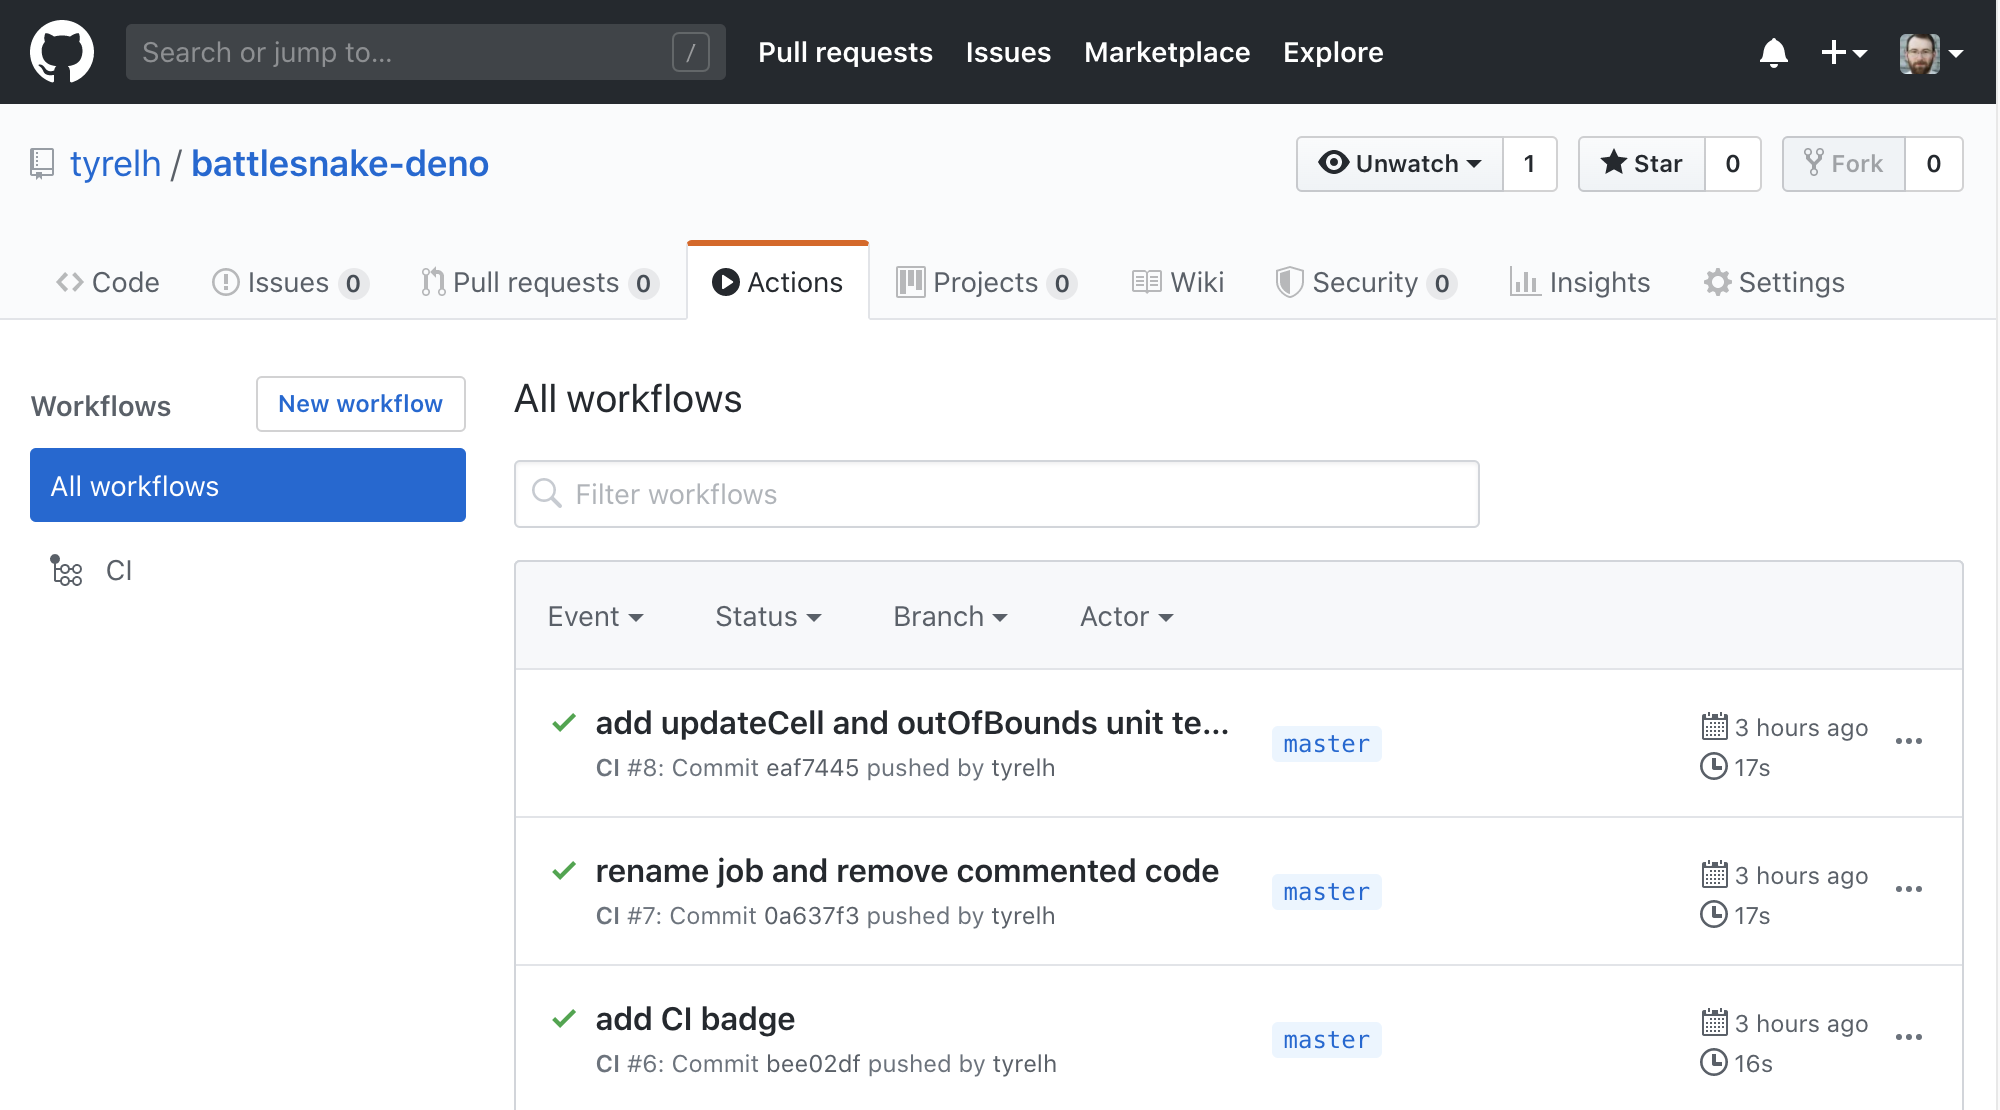
If you visit the Actions tab of your repo now you will see your Actions and the history of all the times they have run. You can click into them for more details and to see the console outputs. Also by default it will email your Github account email whenever an action fails. I imagine this can be changed somewhere if you don't like that.
Automate Deno tests
Now I wanted to try to run my tests using Deno. I knew this would involve installing Deno somehow so I searched around.
I found this repo from denolib with exactly what I wanted.
Really all you need to do is add the uses line pointing to this repo to your workflow .yml file under the steps section. You can also include the Deno version you prefer. Then within the run section you now have access to deno and all of its functions.
So now my workflow .yml file looks like this:
name: CI

on:
  push:
    branches: [ master ]
  pull_request:
    branches: [ master ]

jobs:
  build:
    runs-on: ubuntu-latest

    steps:
    - uses: actions/checkout@master
    - uses: denolib/setup-deno@master
      with:
        deno-version: v1.x
    - run: deno run https://deno.land/std/examples/welcome.ts
One really cool feature of Deno is that you can run scripts from the web right in the terminal, and you can also do this right within Github Actions. That is what the URL is doing in
- run: deno run https://deno.land/std/examples/welcome.tsYou can run this and then look within your Github Actions for the console output from this example welcome.ts file.
So now to run my tests, all I needed to do was change that deno run command to deno test. My final .yml workflow looks something like this:
name: CI

on:
  push:
    branches: [ master ]
  pull_request:
    branches: [ master ]

jobs:
  run-tests:
    runs-on: ubuntu-latest

    steps:
    - uses: actions/checkout@master
    - uses: denolib/setup-deno@master
      with:
        deno-version: v1.x
    - run: deno test
Now every time I push to my master branch all my tests will be run, including any new tests I just committed, and I will be notified both on the Github UI and in my email if any tests fail. I can then log into Github and look at the output to see what failed.
I hope this small guide helped you out and showed you just how simple both Deno and Github Actions are!